Tip of the Week: Change Your Tools in Microsoft Word
Customizing the Quick Access Toolbar
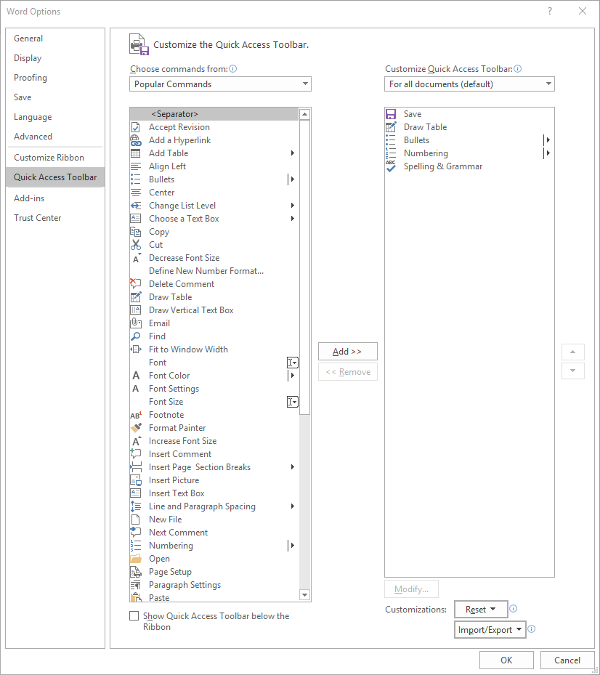
In the top-left corner of the window, you?ll see the Quick Access Toolbar. This houses options such as Save, Undo, and Redo. You can adjust your preferences to make these buttons even more helpful. To make these changes, you?ll first need to access the Quick Access Toolbar?s options. Follow this path: File > Options > Quick Access Toolbar. It will look like this:
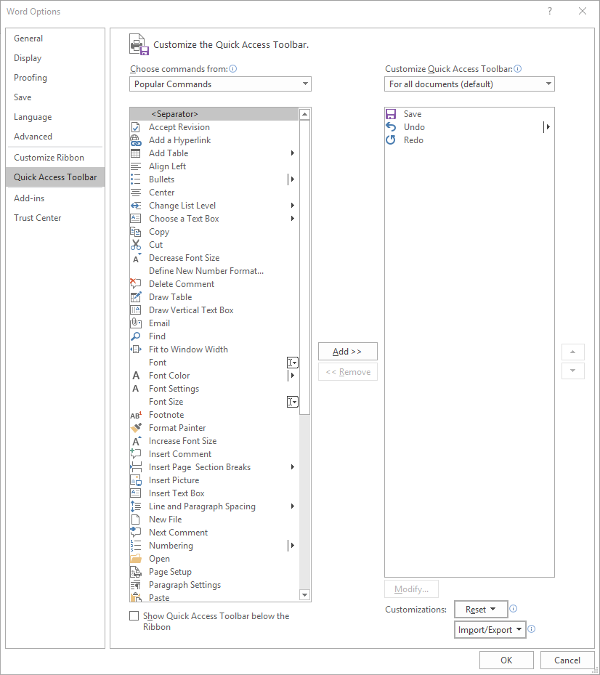
From this selection, you should notice Save, Undo, and Redo options in the Quick Access Toolbar. This is nice, but it?s generally easier to use keyboard shortcuts for these tools.
You can keep various tools in the Quick Access Toolbar, changing them up as needed. You just need to select the items and click the appropriate button for Add>> or <<Remove. The list will default to Popular Commands, and so will we for this tutorial, but know that it can be customized to suit your needs.
If you use Word to put data into context, including lists and tables, you can customize your Quick Access Toolbar to meet these preferences.
Click OK and your changes will be saved. You can always revert to the default settings by using the Reset option if you?re not happy with your selections.
Customize the Ribbon
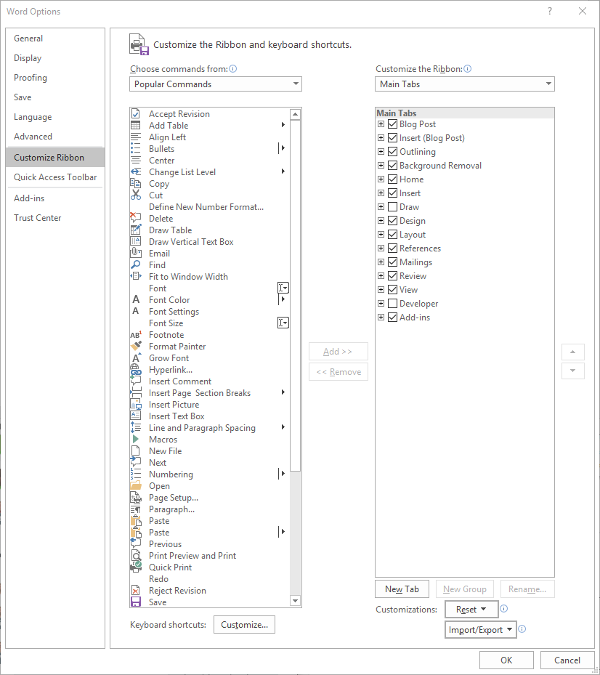
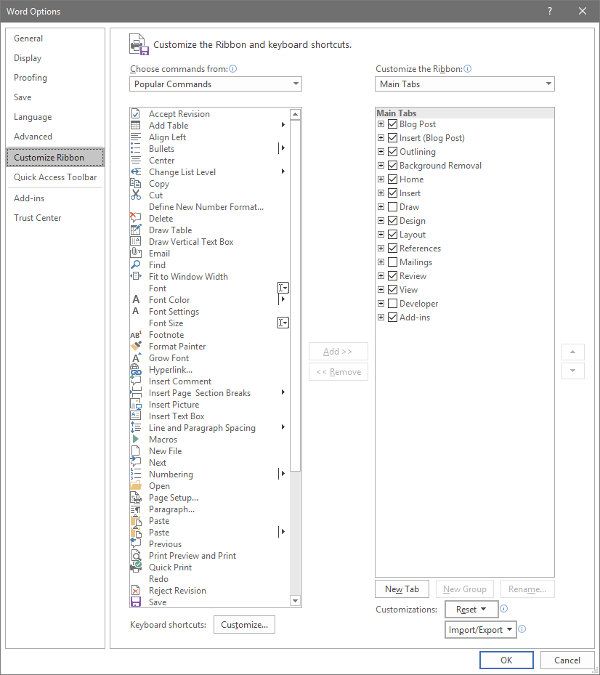
The ribbon is where you find your options for Home, Insert, and others. Depending on usage, you may have an increased or decreased need for certain options. Let?s say that you have no use for the Mailings or Draw tab, and you?d like to remove them. You can do this by accessing File > Options > Customize Ribbon.
You can adjust what?s displayed in the ribbon by unchecking the box, thus removing them from the ribbon display.
Customizing the Status Bar
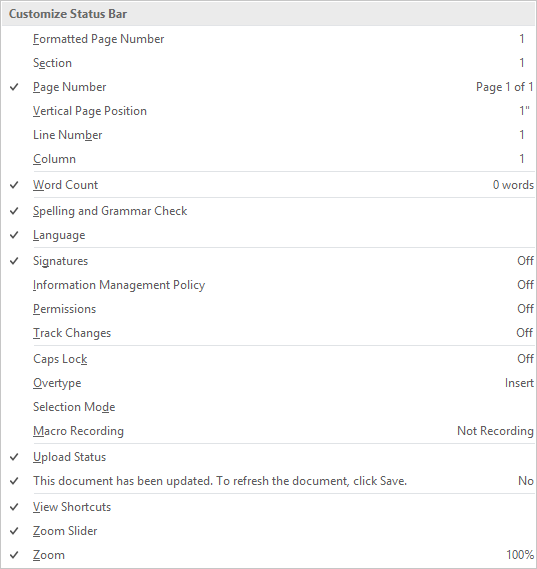
At the bottom of the window, you?ll see the Status Bar. This can be used to provide you with prioritized information. To set this up, right-click on the Status Bar and select or deselect the options.
For more great tips and tricks, be sure to subscribe to our blog.


